The Definitive Guide to Mastering Non-Destructive Editing in Photoshop
Once the Designer start developing instincts, staying efficient and adaptable will become key metric for producing great work.
Whether you’re tackling a client project or exploring your creative ideas, non-destructive editing is a game-changer. It allows you to experiment and make changes without permanently altering your original Layer/Document.
In this Article, we’ll break down what non-destructive editing is, why it matters, and how to use it effectively in Adobe Photoshop.
What does Non-Destructive Editing mean?
Non-destructive editing allows the designer to make adjustments for the document without permanently altering the original content.
This method gives the designer the freedom to experiment and revise the edits at any stage of workflow, this method ensures the original document/Layer remains intact.
In contrast, destructive editing will alters the pixel data, making it impossible to return to the original image without starting from scratch.
Why Non-Destructive Editing is important ?
- Flexibility: This type of editing will always allow the designer to revert back to the original Document/layer and let’s the designer make further changes without losing previous edits.
- Creative Freedom: Non-destructive editing allows the designer to experiment with different effects, adjustments, and filters without the fear of permanent alteration to the document.
- Adaptability: While working on real projects, clients often request revisions (a lot of it). Hence Non-destructive editing will allow designer to quickly tweak adjustments or effects without having to restart the entire Design project.
Different Non-Destructive Editing Techniques available in Photoshop
1. Using Adjustment Layers

With the help of Adjustment layers designers can make tonal and color changes without affecting the original image.
These adjustments can be altered, removed or hidden at any point of time while working on the project. Some of the common adjustments layers include brightness/contrast, hue/saturation, and curves.
How to use a Adjustment Layer:
- Open the Layers panel by going to Window > Layers
- At the bottom of the Layers panel, click on the “New Adjustment Layer” icon (a half-filled circle).
- A menu will appear with different adjustment layer options like Brightness/Contrast, Curves, Levels, Hue/Saturation, Selective Color etc.
- Choose the desired adjustment type you need to apply for your Document.
Most common usage of adjustment Layers:
- Portrait Retouching: Softening skin, adjusting lighting, and changing tones.
- Color Grading: Experimenting with different color schemes on layers for brand or mood consistency.
2. Using Layer Masks

Through Layer masks designers can easily hide or reveal parts of a layer without permanently deleting any content. This is useful for selective editing. How to use Layer masks using selective Editing ?
How to add a Layer Mask:
- Select the Layer: First, select the layer in the Layers panel that you want to add a mask to.
- Adding the Mask: At the bottom of the Layers panel, click the Add Layer Mask icon (a rectangle with a circle inside it). This will add a white layer mask next to the selected layer.
Most common usage of Layer Masks:
- Compositing Multiple Images: When there is a requirement for Blending multiple layers into a single Image Layer mask is the most useful feature.
- Local Adjustments: Layer mask can be used to Darken or brighten up specific parts of a photo/Layer in a Design Document.
3. Using Smart Objects
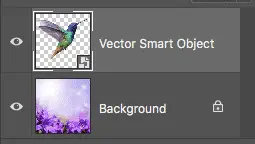
Smart objects as the name suggest is a smart way to edit Layers in Photoshop These Layers retain the original data of a layer even if you scale, rotate, or apply filters.
This way, you can make reversible adjustments, keeping the file quality intact.
How to convert a Single Layer to a Smart Object:
- Right-click on the layer you want to convert in the Layers panel.
- Select Convert to Smart Object from the context menu.
When to use:
- Design Elements: when adding Vectors to the document like logo, icons, or illustrations that may need resizing/Scaling in the future without loss in quality.
- Filters: Applying filters like Gaussian blur or liquify with the flexibility to edit the settings later without any change to the original Smart object Layer.
4. Clone Stamp/Healing Brush.
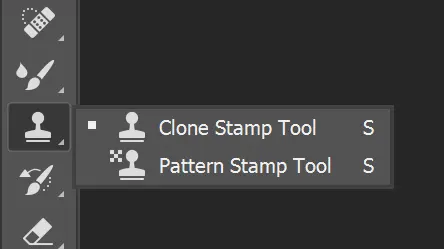
As the tool name suggest this tool is used to clone a part of layer onto another layer without disturbing the original document/Layer.
The most important advantage of the Clone Tool is its ability to seamlessly remove unwanted elements and imperfections in an image?Layer while maintaining the natural and realistic appearance.
How to Identify Clone Stamp tool in Photoshop:
- Open Photoshop and make sure you have an image open.
- In the Tools panel (usually on the left side of the screen), look for the Clone Stamp Tool icon. It looks like a stamp.
When to use:
- Spot Removal: Eliminating blemishes, dust, or small unwanted objects especially while Editing Portraits.
- Texture Refinement: Enhancing skin, fabric, or surface textures while maintaining full control over final changes.
Non-destructive editing helps the designer to experiment, revise, and make the designs better without having to worrying about irreversible changes. With this type of flexibility designers can fine-tune the edits as per Client’s requirement.
By mastering techniques like adjustment layers, layer masks & smart objects, designers can stream line their workflow and create polished, professional results every time.
See you in the next one……✌️

